Workflow Guide
This guide follows the typical Ultralyzer workflow from a new image folder to exported results. It assumes the MATLAB backend path described in Installation and Setup.
Workflow overview
Load images and any existing masks.
Review image quality and save QC decisions.
Run segmentation for the current image or pending images.
Inspect image channels, overlays, and ROI display.
Edit masks and place the fovea if required.
Calculate metrics.
Export a workbook or PSD files.
Tip
Use the current GUI labels as your guide. If a step mentions Segment current image or Calculate current metrics, those are the exact buttons shown in the workflow sidebar.
1. Load data
Load images
Use File > Open Image Folder… to load the main image directory.
The folder label in the top navigation row updates immediately.
The searchable image dropdown is populated with the available files.
The image filter can then be used to narrow the visible list.
Load existing segmentations
If you already have masks, use File > Load Segmentation Folder….
Masks are matched to images by filename.
Images and masks should live in different folders when masks were generated externally.
Masks are expected as
.pngfiles even when the source images use other image formats.
Import PSD or DICOM data
Use the File > Import submenu when you need to ingest external material:
PSD Segmentations… imports layered PSD masks.
DICOM Images… converts supported DICOM files into the project.
2. Review image quality
Review the currently displayed image before running batch actions.
Inspect focus, illumination, field of view, artifacts, and any pathology that affects analysis quality.
Add notes in the Notes field when you need image-specific context.
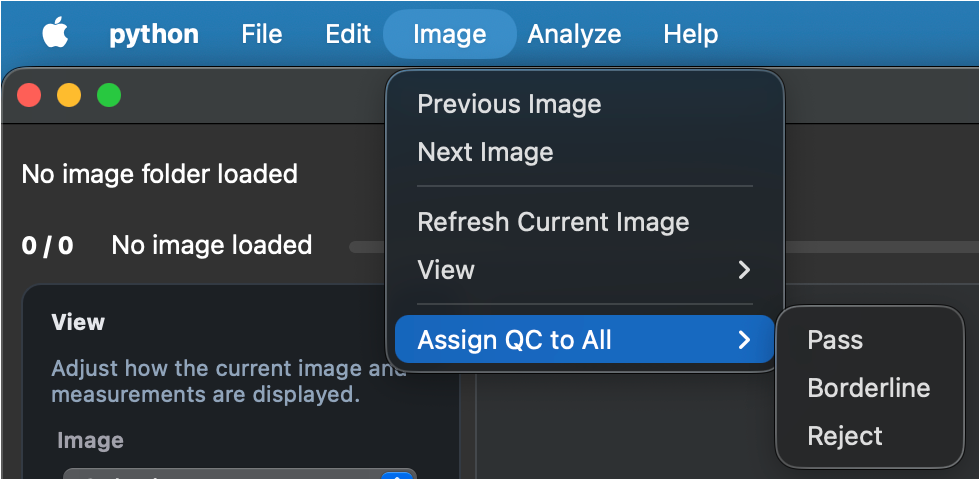
Choose one QC decision in the Review card:
Pass
Borderline
Reject
Batch processing is intended for the usable images, so this step matters.
Tip
To apply one QC decision to the full filtered set, use Image > Assign QC to All.
3. Run segmentation
Ultralyzer supports both current-image and pending-image segmentation flows.
Current image
Use either of these entry points:
Segment current image in the Current image card
Analyze > Current Image > Segment in the menu bar
Pending images
For batch work, use Analyze > Pending Images > Segment Pending Images
Warning
You may need to reset your segmentation mask after having saved edits and moved to a different image. In that case, you can re-run Artery/Vein and Optic Disc segmentation independently from Analyze > Segmentation.
4. Inspect the display before editing
The left sidebar controls how the current image is visualized.
Image and overlay views
Use the dropdowns to inspect:
image view:
Color image,Red channel,Green channel,Blue channelmask view:
Arteries,Optic disc,Veins,All vessels,All masks,No mask
The number keys documented in Keyboard shortcuts are useful when you want to switch overlays quickly.
Metric ROI
Use Metric ROI to decide which ROI definitions are active for display and ROI-dependent metric calculation.
The current default ROI definitions are:
Full imageCentral retinaMid-periphery
When Show ROI edges is enabled, the selected ROI combination is drawn on the canvas.
Canvas overlays
Use these toggles when reviewing a result:
Show ROI edges
Show fovea
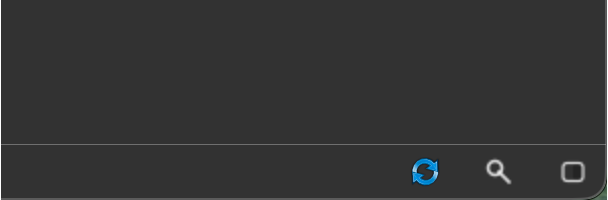
The status bar utilities are also useful here. You can find them in the bottom-right corner of the window::
Refresh to reload the image and mask
Zoom for
{fit, actual size, and centering}controlsOpacity for segmentation mask transparency
5. Edit masks when needed
If the segmentation needs correction, click Edit mask to enter edit mode.
Editing goals
During editing, focus on the structures that directly affect metrics:
keep arteries and veins as continuous vessel paths
correct artery-vein crossings when the classification is wrong
keep the optic disc mask complete
set the fovea location when it is missing or incorrect
Editing tools
The Tools card provides:
Brush: paints directly into the overlay channel you are currently editing. In practice, this means the selected mask view matters. If the overlay is set to
Arteries, the stroke paints only artery pixels. If it is set toOptic disc, it paints only the disc layer. If it is set toAll vesselsorAll masks, the stroke affects every visible mask channel in that view. If the overlay is set toNo mask, the stroke is ignored.Smart paint: follows the stroke path like the brush, but only repaints pixels that already belong to a vessel. It is intended for artery-vein correction, not for drawing new vessel regions from empty background. It only applies when the overlay is set to
ArteriesorVeins.Eraser: removes pixels from the currently active overlay channels. As with the brush, the current mask view determines what is erased. If you erase while viewing
Arteries, only the artery mask is affected. If you erase while viewingAll masks, the stroke removes every visible mask channel under that path.Swap: works with a single click rather than a freehand stroke. Click a vessel region to flood-fill the connected component and switch its artery-vein classification. This is most useful when a continuous vessel segment has been assigned to the wrong vascular class.
Fovea location: click once on the canvas to save the fovea location for the current image. After placing or correcting the fovea, re-run metric calculation so disc-fovea measurements update.
Brush size slider: changes the radius used by Brush, Smart paint, and Eraser. Use a smaller radius for crossings and fine branches, and a larger radius for broad edits.
Tip
When you are editing, first switch the Mask overlay dropdown to the specific structure you want to change. That keeps the brush and eraser constrained to the intended layer instead of affecting multiple channels at once.
Use the keyboard shortcuts in Keyboard shortcuts to move faster while editing.
Save and exit
Use Save Edits from the Edit menu or
Ctrl+S.Use Undo and Redo for correction loops.
Use Exit edit mode when you want to return to the review workflow.
6. Calculate metrics
Once the mask and fovea are in a good state, calculate metrics.
Current image metrics
Run metrics from:
Calculate current metrics in the workflow sidebar
Analyze > Current Image > Calculate Metrics in the menu bar
Pending image metrics
Use Analyze > Pending Images > Calculate Pending Metrics when you want to batch-process the images that Ultralyzer currently treats as pending for metrics.
For this action, an image is considered pending when its QC decision is Pass or Borderline.
The batch pass recalculates the image-level landmark metrics for those images.
ROI metrics that already exist for the selected ROI definitions are skipped rather than recomputed.
If an image still has no saved segmentation, metric calculation for that image will fail, so run segmentation first when needed.
This is different from the No metrics image filter, which only shows images that do not yet have saved image-level landmark metrics.
Geometry readiness matters
Before you calculate metrics, check the geometry readiness dot in the Current image card.
Greenmeans geometry-dependent metrics should be available.Yellowmeans only part of the geometry workflow is available.Redmeans geometry-dependent metrics will be skipped.
This affects measurements such as geodesic distances and area-based metrics. The application stays usable even when those metrics cannot be produced.
Note
If the fovea is missing, Ultralyzer logs a warning and asks you to identify it with the edit-mask workflow before rerunning metrics.
For the current metric families and metric key patterns, see Metric definitions.
7. Export results
Use File > Export once the dataset is reviewed and processed.
Results Workbook
This exports the workbook containing QC information, image-level landmark metrics, and ROI-specific metric sheets.
PSD Segmentations
PSD stands for Photoshop Document, a layered image format. In this workflow it is useful because Ultralyzer can store the artery, vein, and optic-disc masks as separate editable layers instead of flattening everything into one image.
That makes PSD export a practical handoff format when you want to:
review the segmentation in external image-editing software
correct one structure without destroying the others
keep the original color image and green channel available as aligned reference layers
import the layered result back through File > Import > PSD Segmentations…
Tip
If the user has access to a Tablet/iPad/PC with a stylus, exporting to PSD and editing in Sketchbook, or a similar app, can be a more intuitive way to make complex edits than using the brush and eraser tools in Ultralyzer.
This exports layered PSD files containing:
the original color image
the green image channel
artery, vein, and optic-disc segmentation layers
You can export either:
Current Image
All Images
8. Recommended daily workflow
For routine use, this sequence tends to work best:
Load a folder.
Filter to unreviewed images.
Save QC decisions.
Segment the current image or run pending segmentation.
Inspect overlays and ROI settings.
Edit masks where needed.
Check geometry readiness.
Calculate metrics.
Export the workbook.